
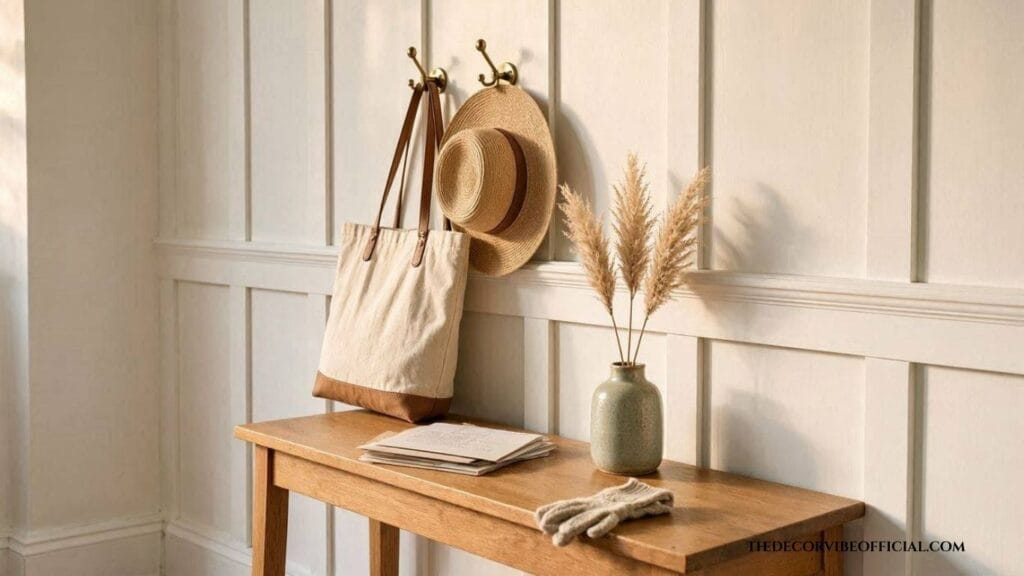
Our first house had a hallway I hated. Builder-grade drywall, one sad framed print, and a scuff mark near the light switch that never came off no matter how hard I scrubbed. A friend came over, looked at the blank stretch of wall, and said “you need board and batten here.” I had no idea what she meant. Six weekends and one trip to the hardware store later, I had a wall people asked about the second they walked in the door. Board and batten wall ideas turn out to be one of the cheapest ways to make a builder-grade room feel designed on purpose, and once you understand the spacing and the setup, the whole project stops feeling intimidating.
If you’ve been scrolling Pinterest wondering whether this trend is worth a weekend, here’s what works, room by room, budget by budget, mistake by mistake.
What Board and Batten Wall Ideas Look Like in Real Rooms
Board and batten is a wall treatment built from wide vertical (or sometimes horizontal) boards, with narrower strips called battens covering the seams between them. Builders originally used it on barns and cottage exteriors to keep water out of the joints between wide siding boards. Indoors, the same structure now works as a decorative wainscoting style, adding depth and shadow lines to a flat wall without much carpentry skill required.
Want a more modern, horizontal alternative instead? See this wood slat accent wall guide.
Board and Batten vs. Wainscoting vs. Shiplap
People mix these three up constantly, so here’s the short version. Wainscoting is the umbrella term for lower-wall paneling in general. Board and batten is one specific style of it, built from vertical strips. Shiplap uses horizontal overlapping boards instead of vertical ones. Board and batten reads structured and grid-like; shiplap reads more rustic and horizontal, and full wainscoting panels read more formal and traditional.
The Basic Anatomy
A board and batten wall has three main parts: a baseboard trim at the bottom, a top rail (or picture rail) marking the finished height, and evenly spaced vertical strips running between them. Most home centers sell pre-primed MDF battens made specifically for this project, so building your own lumber from scratch isn’t necessary anymore.
Why Board and Batten Wall Ideas Work in Almost Any Room
The reason this style keeps showing up in every renovation feed comes down to shadow and proportion. A flat painted wall absorbs light evenly and reads flat, both in photos and in person. Add vertical strips, and each one casts a thin shadow line that breaks the wall into sections your eye tracks naturally, almost like reading a page instead of staring at a blank screen.
That structure does two things at once. In a small room, it draws the eye upward and makes low ceilings feel taller. In a large, echoey room, it adds enough visual weight that the space stops feeling like an unfinished box waiting for furniture to save it. Designers lean on board and batten in entryways, dining rooms, and primary bedrooms specifically because it reads expensive without needing expensive furniture to back it up.
It’s one of the few upgrades where a $200 material cost regularly gets mistaken for a custom millwork job. <blockquote><strong>Did You Know?</strong> Board and batten started as an exterior siding method on 18th century American farmhouses, built to keep wind and rain out of the gaps between wide barn boards. The indoor decorative version didn’t become common until farmhouse style went mainstream in the 2010s, and it has stayed popular well past that trend cycle because it works with almost any style of furniture.</blockquote>
If you want more ways to style that same wall, check out these front door entryway ideas first.
Key Elements Every Board and Batten Wall Needs
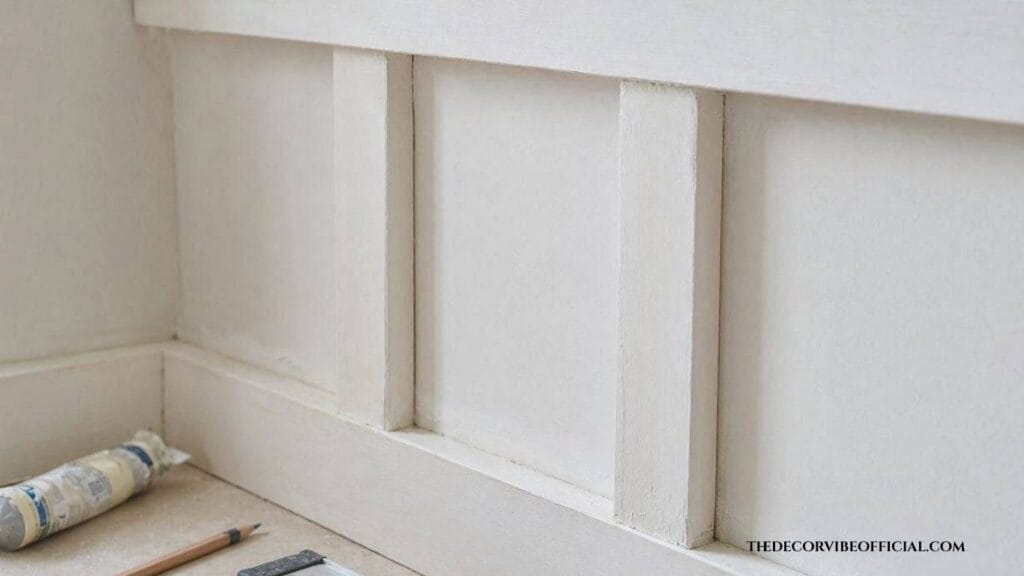
Before buying a single board, it helps to know the pieces involved.
- Baseboard or base cap: the horizontal trim piece the vertical battens sit on top of
- Vertical battens: the narrow strips, usually 1×2 or 1×3 primed MDF or pine
- Top rail: a horizontal cap piece marking where the treatment ends, often at chair rail or picture rail height
- Corner and end pieces: wider boards used at outside corners so the grid lines up cleanly
- Caulk and wood filler: for hiding nail holes and seams before painting
Here’s a quick breakdown of how these elements translate into different rooms, since the “right” height and finish shifts depending on where the wall sits in the house.
| Style Element | What to Use / How It Looks |
|---|---|
| Entryway height | Chair rail height (32-36 inches), painted to match trim |
| Dining room | Full wainscoting height (48-54 inches), often with a picture ledge on top |
| Bedroom accent wall | Floor to ceiling, one bold color for a headboard-style focal wall |
| Bathroom | Half wall height with moisture-resistant primer and semi-gloss paint |
| Hallway | Chair rail height with hooks added between battens for storage |
| Home office | Standard chair rail height, often paired with a darker, moody paint color |
Board and Batten Wall Ideas by Room: Five Real Layouts
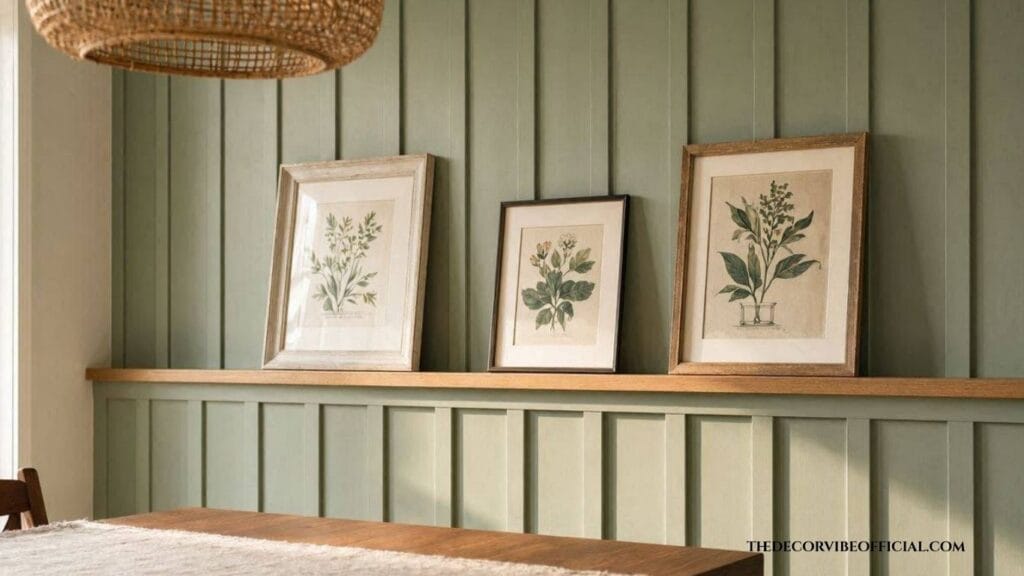
Reading about spacing only gets a person so far. Here’s how this treatment plays out in five actual rooms, with enough detail to picture the finished result before buying materials.
Room: Entryway Look: White chair-rail-height board and batten with brass coat hooks mounted between every third batten, a slim console table pushed against the wall, and a round mirror centered above it for extra light bounce near the front door.
Room: Dining Room Look: Sage green board and batten running the full wall height, topped with a narrow picture ledge holding framed botanical prints, paired with a walnut dining table and woven pendant light overhead.
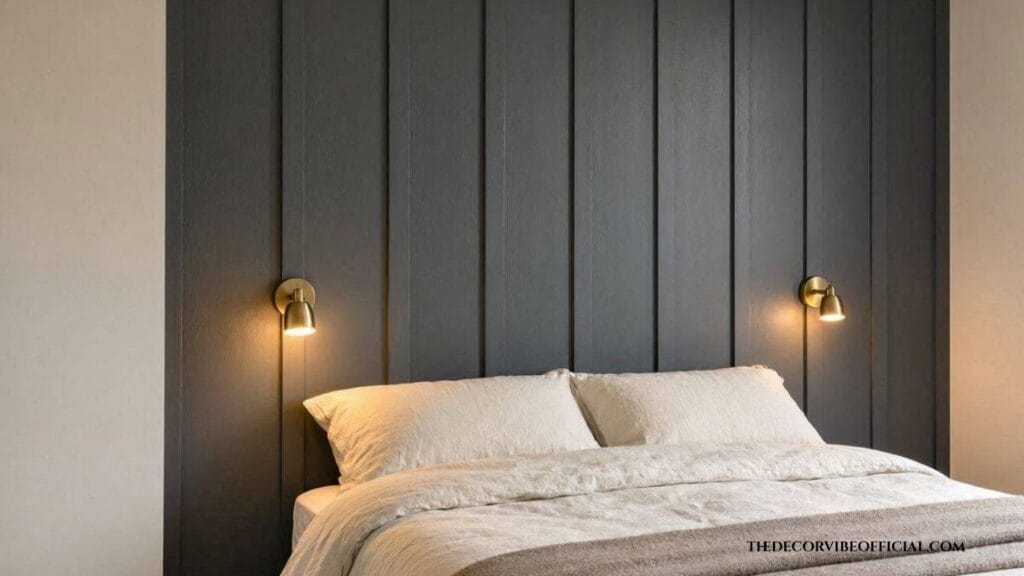
Room: Primary Bedroom Look: Floor-to-ceiling charcoal board and batten behind the bed only, acting as an oversized headboard, with warm brass sconces mounted directly onto two of the battens instead of a nightstand lamp.
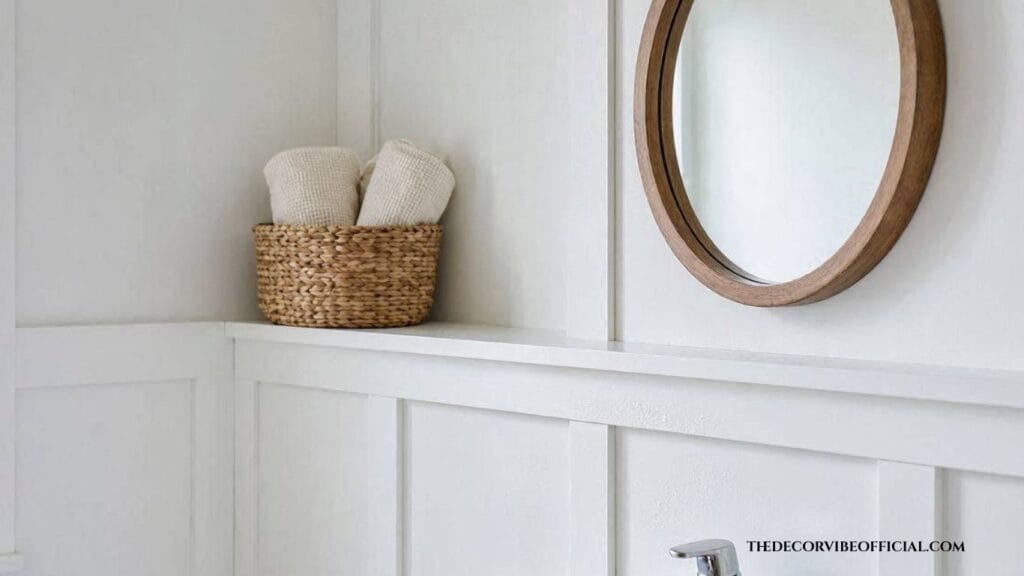
Room: Bathroom Look: Crisp white board and batten at 42 inches, painted in a moisture-resistant semi-gloss, with a wood-framed mirror and a woven basket for towels sitting above the top rail.
Room: Home Office Look: Navy board and batten on the wall behind the desk, spaced slightly wider than the standard grid for a more modern look, with one black-and-white framed print centered in a single panel.
Color and Material Choices That Make It Look Custom
The fastest way to make board and batten look like a cheap kit instead of a built-in feature is painting it the wrong color relative to the surrounding wall. Monochrome is the move here: paint the battens and the wall behind them the exact same color and sheen. The shadow lines do the visual work on their own, so contrast isn’t needed to make the grid pop, and skipping contrast is what separates a DIY-looking wall from one that reads professionally installed.
MDF battens are the budget standard and take paint beautifully, but they aren’t a great fit for bathrooms or mudrooms where moisture is a factor over time. Solid pine or PVC battens cost more upfront but hold up far better in humid rooms and near exterior doors.
Still deciding on a shade? These accent wall paint colors for a bedroom break down what works best.
Comparing Batten Materials
Material choice affects both budget and how long the wall holds up. Primed MDF runs the cheapest per linear foot and cuts cleanly, making it the go-to choice for dry living spaces like bedrooms, home offices, and dining rooms. Solid pine costs more but resists dents better and takes stain instead of paint if a natural wood look is the goal. PVC or moisture-resistant composite battens cost the most upfront, yet they’re the only sensible option for a bathroom, laundry room, or mudroom near an exterior door, since MDF swells and softens once it’s exposed to repeated humidity or splashes.
Popular Color Directions
- Warm white or off-white for a classic, resale-friendly look
- Deep green or navy for a moody, designer-style accent wall
- Terracotta or clay tones for a warmer, Mediterranean-leaning room
- Black, used sparingly on one wall, for a dramatic modern statement
Budget-Friendly Board and Batten Wall Ideas
A contractor isn’t necessary for most of this project. A single accent wall in an average bedroom typically runs $150 to $300 in materials when using primed MDF battens, a gallon of paint, construction adhesive, and a nail gun rental from a local tool shop.
A few ways to bring the cost down further:
- Skip the top rail and picture ledge; a simpler flat-top design cuts material and labor time
- Buy battens in bulk from a home center rather than pre-cut kits, which carry a markup for convenience
- Use a laser level instead of paying for professional layout and marking services
- Start with one accent wall instead of an entire room, then expand once the first attempt turns out well
<blockquote><strong>Quick Answer:</strong> A DIY board and batten accent wall in a 10×10 bedroom typically costs under $250 in materials and takes one weekend for a first-time installer.</blockquote>
Looking for an even cheaper texture upgrade? This faux brick wall DIY guide is worth trying too.
Common Board and Batten Mistakes to Avoid
A handful of mistakes show up over and over in DIY board and batten projects, and each one is easy to prevent once flagged ahead of time.
Uneven spacing. Eyeballing batten placement instead of measuring and dividing the wall mathematically leads to a lopsided grid, and it becomes obvious the moment natural light hits the wall at an angle.
Skipping caulk. Unfilled seams between the batten and the wall catch shadows and dust, and they’re the first detail a trained eye notices in an amateur install.
Wrong height for the room. A batten height that stops mid-window or collides with an outlet looks unplanned. Measure around fixed elements like switches, outlets, and window trim before cutting anything.
Ignoring existing trim. New battens should match or complement the existing baseboard style rather than clash with it in a totally different profile or thickness.
Rushing the paint prep. Skipping a coat of primer over MDF seams leads to visible flashing once the finish paint goes on, especially under bright overhead lighting.
Board and Batten for Small Spaces vs. Large Rooms
Room size changes how this treatment should be planned, and the same layout won’t suit every space equally well.
Small Rooms and Powder Bathrooms
Keep the batten spacing narrower and the color monochrome with the walls. A tight, consistent grid reads intentional in a small footprint, while wide gaps in a tiny room tend to feel unfinished or oversized for the available space.
Large or Open-Concept Rooms
Bigger rooms handle wider batten spacing and taller heights well, sometimes running the treatment floor to ceiling on a single feature wall rather than around the entire perimeter. This approach keeps material costs down while still giving the room the architectural weight it needs to feel finished.
Rentals and Temporary Homes
Removable, no-nail batten strips, attached with a strong construction adhesive rated for rental use, let renters get the look without permanent wall damage. The finished result reads slightly less crisp than a nailed installation, but it holds up fine for a lease term or two.
How to Install Board and Batten Step by Step
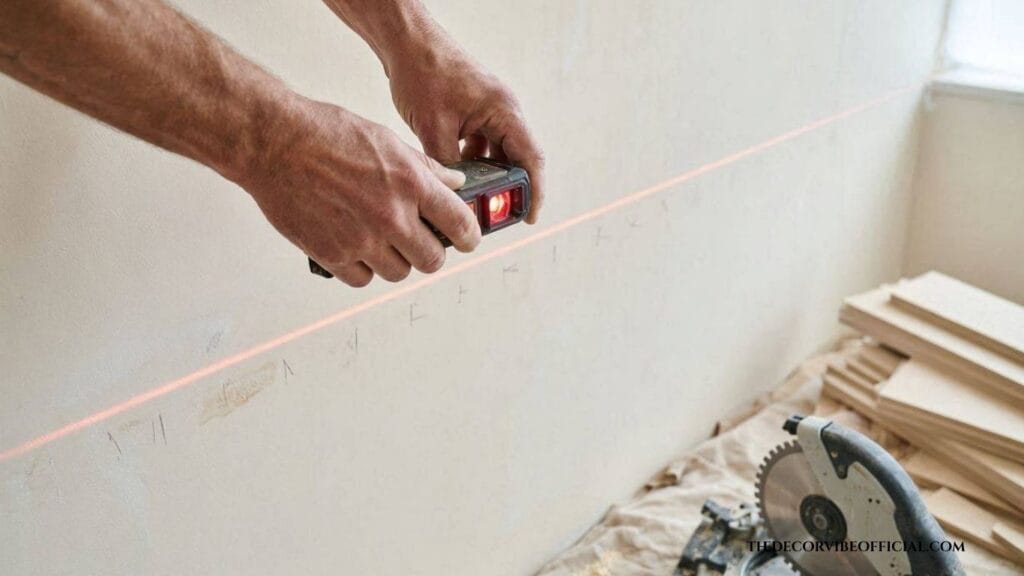
Most competitor round-ups stop at inspiration photos and skip the part homeowners need most: the actual install order. Here’s the process from start to finish.
Step 1: Measure and Plan the Layout
Measure the full width of the wall and decide on a batten count before cutting anything. A common rule of thumb is spacing battens 12 to 18 inches apart on center, adjusting slightly so the spacing lands evenly around windows, outlets, and corners instead of cutting through them.
Step 2: Mark Stud Locations
Run a stud finder across the wall and mark every stud location lightly in pencil above the planned top rail line. Battens that land on a stud get a stronger, more secure hold, though construction adhesive handles the rest of the load between studs.
Step 3: Install the Top Rail and Baseboard
Cut and attach the horizontal top rail first, using a level to keep it perfectly straight across the entire wall. If a baseboard is not already installed, add it now as the bottom boundary of the grid.
Step 4: Cut and Attach the Vertical Battens
Cut each batten to the exact height between the baseboard and top rail. Apply construction adhesive to the back of each strip, press it into place, then secure it with a brad nailer at the top and bottom.
Step 5: Fill, Caulk, and Paint
Fill every nail hole with wood filler, run a thin bead of paintable caulk along each seam where the batten meets the wall, then sand lightly once dry. Two coats of paint in a semi-gloss or satin finish, applied evenly across the battens and the wall behind them, complete the look.
Where to Shop for Board and Batten Materials
Most of what’s needed sits in the trim aisle of a home center. Look for pre-primed MDF board labeled specifically for wainscoting or batten projects, which saves an entire round of priming before paint goes on.
For tools, a basic setup includes a miter saw or miter box, a brad nailer or nail gun, a stud finder, a level (a laser level speeds this up considerably), wood filler, and paintable caulk. Big box stores also sell pre-packaged batten kits sized for standard wall widths, which cost more per foot but arrive with pre-cut pieces for anyone who’d rather skip the measuring and math altogether.
Frequently Asked Questions
What is the standard height for board and batten walls?
Chair rail height, around 32 to 36 inches, is the most common choice for hallways and entryways. Dining rooms often go taller at 48 to 54 inches, and bedroom accent walls sometimes run floor to ceiling for a bolder look.
How much does a DIY board and batten wall cost?
Expect $150 to $300 in materials for a single accent wall using primed MDF battens, paint, and adhesive. Costs rise with taller heights, solid wood battens, or added trim pieces like a picture ledge on top.
Does board and batten work in a small room?
Yes, and it often helps more in small rooms than large ones. Keep the spacing consistent and paint the battens the same color as the wall so the grid adds texture without visually shrinking the space.
Is it possible to install board and batten without nail holes?
Removable adhesive strips exist for rental-friendly versions, though a nailed installation with wood filler and caulk gives a cleaner, more permanent finish for a home someone plans to stay in long term.
What paint sheen works best for board and batten?
Semi-gloss or satin holds up to cleaning and shows off the shadow lines from the batten edges better than flat paint, especially in high-traffic hallways and bathrooms where fingerprints and moisture come into play.
Board and batten isn’t a one-weekend trend that fades once the next style takes over Pinterest. It’s closer to a piece of permanent architecture, built from a handful of trim pieces and a can of paint, and it tends to outlast whatever furniture sits in front of it. Start with one wall, get comfortable with the spacing and the paint prep, and the next room feels far less intimidating.
Next time you walk past a plain builder-grade wall and feel like something’s missing, you’ll know exactly what to reach for.
